Symptoms & Diagnosis
If your computer consistently loses its system time or resets BIOS settings to default every time you power it off, you are likely facing a CMOS battery drain issue. A healthy CR2032 battery should last between 3 to 5 years.
The most common symptoms include “CMOS Checksum Error” messages during boot, the PC failing to POST (Power-On Self-Test), or hardware clock synchronization issues in the operating system. If you replace the battery and it dies again within weeks, the motherboard has a hardware fault.
Before testing, ensure the computer is completely unplugged from the wall outlet. Residual power can interfere with your readings and potentially damage your testing equipment.
Troubleshooting Guide
To accurately test for a drain, you will need a digital multimeter. We need to check both the battery’s remaining voltage and the current draw from the motherboard’s battery circuit.
Step 1: Testing Battery Voltage
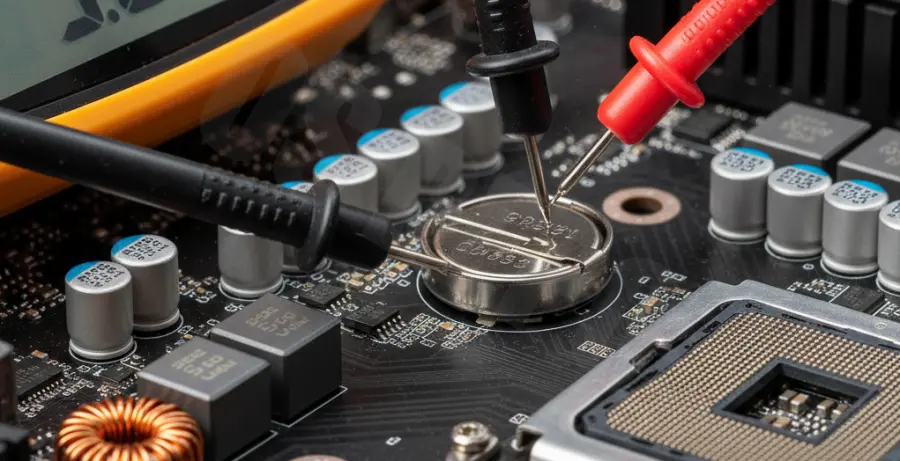
Set your multimeter to the DC Voltage setting (20V range). Place the red probe on the top of the battery (+) and the black probe on the side or the motherboard’s ground (-) point. Use the following table to interpret your results:
| Voltage Reading | Battery Status | Action Required |
|---|---|---|
| 3.0V – 3.3V | Healthy | No action needed. |
| 2.7V – 2.9V | Low | Replacement recommended soon. |
| Below 2.6V | Dead | Replace immediately. |
Step 2: Testing for Circuit Leakage (The “Drain” Test)
To see if the motherboard is “eating” the battery, you must measure the current (Amperage). Remove the battery and set your multimeter to the Microamps (µA) or Milliamps (mA) setting. Connect the probes between the positive and negative terminals of the empty battery holder.
A normal motherboard should draw very little current when powered off. If you see a reading significantly higher than 5-10 µA, there is a short circuit or a failing capacitor on the board. You can also check your current BIOS version via terminal to see if a firmware update addresses power management:
sudo dmidecode -s bios-versionStep 3: Inspecting for Physical Damage
Check the battery socket for corrosion or leaked electrolyte. Use a magnifying glass to look for “bloated” capacitors near the CMOS socket. Sometimes, a simple cleaning with 99% Isopropyl alcohol can resolve high-resistance shorts caused by dust or moisture.
Prevention
Preventing CMOS drain starts with using high-quality lithium batteries. Avoid generic brands that may have inconsistent discharge rates. Extreme temperatures, specifically high heat inside a poorly ventilated case, can also accelerate the chemical breakdown of the battery.
Always use an anti-static wrist strap when handling the motherboard to prevent ESD (Electrostatic Discharge) from damaging the sensitive CMOS circuitry. Finally, keep your BIOS updated, as some manufacturers release patches to optimize power consumption for the onboard RTC (Real-Time Clock).